The theme for Craftsy's March BOM is Foundation Piecing and the two blocks are string blocks. It was quite an experience for me to give no thought whatsoever to the organization of the fabrics. I just dug through all my scraps (it was amazing how much I had accumulated) and randomly sewed them on. It was very liberating.
Take a look at my two blocks on the Craftsy website.
Craftsy March Block of the Month - String Block
To arrive at a 12-1/2" block, the process began with four 6-1/2" squares of muslin. Following Amy Gibson's instructions, each square was marked on adjacent sides of one corner at 1" and the same was done on the opposite corner. Leaving the area between these four marks empty, varying widths of fabric, between 1 and 2 inches , were sewn until the entire foundation square was covered. Using the foundation square as a template the strips of fabric hanging off the ends were trimmed away. The four units were sewn together, pressing all seams open.
This is a great way of using up scraps that have accumulated over the years. I discovered that most of my scraps were left-over pieces of binding. Afraid of running out of binding, I always add 8-10 inches to the recommended length, so there were plenty of strips available.
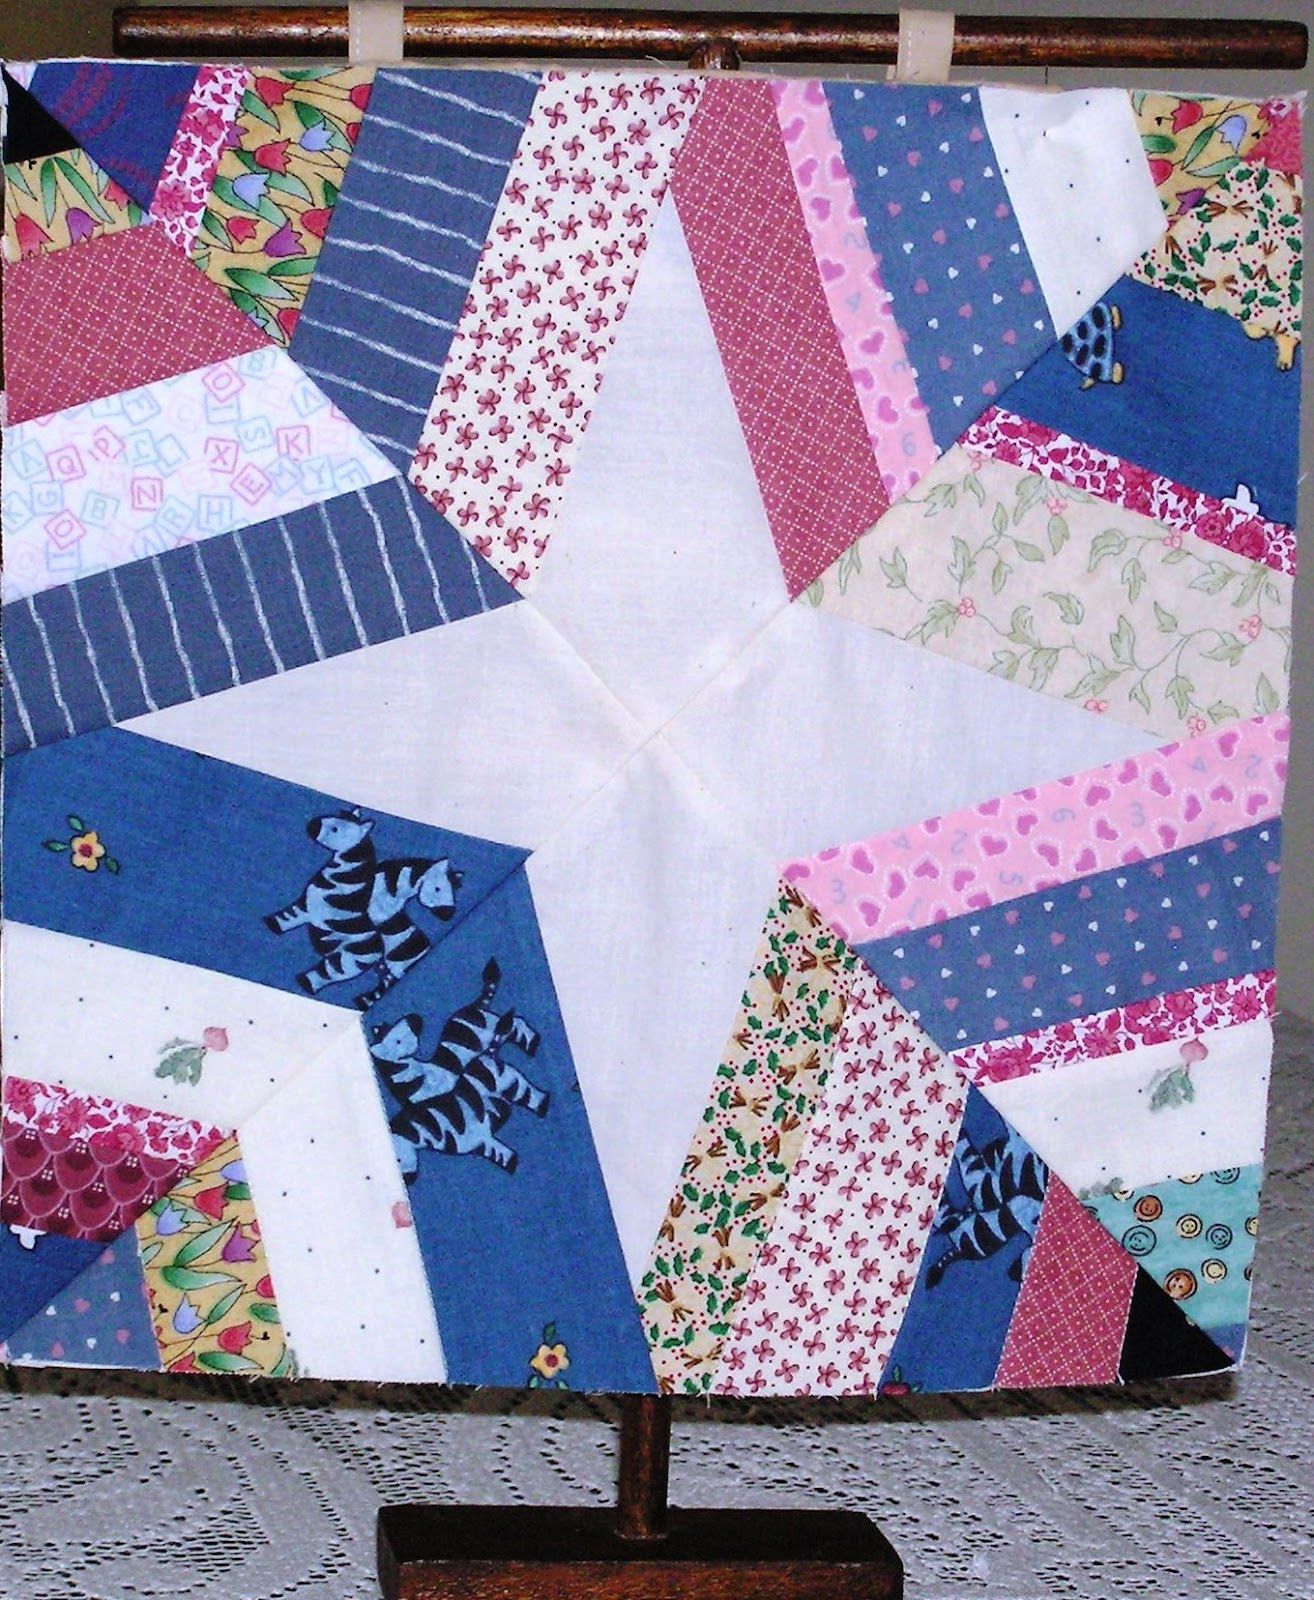
Craftsy March Block of the Month - Broken Spider Web
For this block, one large 13-1/2" square of muslin was segmented diagonally into four triangles and marked as instructed. As in block 1, strips of fabric, between 1 and 2" wide, were sewn away from the marked lines until the entire foundation was covered. Then, using the foundation piece as a template, the units were trimmed until the triangle shape was restored once more.
If I had to do this block over, the one modification I would make would be to edge the center with dark fabrics to make the star stand out.
The instructions were that once the first strip was sewn on to the foundation, it was to be folded out of the way and the strips sewn to each other. After the sewing was completed for each triangle and trimmed, the foundation fabric was to be cut away from the first strip. I ignored this piece of advice and sewed all the strips to the foundation.
Somehow, even after both these blocks were done, hardly a dent was made in this stash. I probably have enough left to make an entire string quilt!
Cheers, everyone!