Showing posts with label Modern. Show all posts

Sunday, April 14, 2013

Elvira's Stars Quilt Along

Elvira's Stars QAL
This is a WIP (Work-in-Progress) from a 
Quilt Along (QAL) I followed on 
Desi Quilters. There are four parts to this QAL 
and I've completed three of them.

Flying Geese Star blocks
Ohio Star blocks
Variable Friendship Star blocks
A preview of Flying Geese & Ohio Star blocks
A preview of Flying Geese, Ohio &
Variable Star blocks
This QAL was fun to follow.  
The instructions were clear and concise. 
Each step in the instructions were complemented by photographs.

Sunday, January 13, 2013

Arkansas Crossroads - My First Modern Quilt (an update)

First part of this quilt and tutorial.
This is where I'm at with this quilt.  After making ten more of each of the two blocks and adding two more rows to the length, it now measures 47.5" x 66.5" (unfinished).  By adding a 5" border on all sides, it should make a comfortable lap quilt that will finish at approximately 60" x 80".

It was a square 47.5" before the two rows were added. This used 48 black and white 5" squares from one charm pack of 50 squares. The order for a second pack of charm squares took forever to get here. Lesson learned: always purchase more than you need!

This is going to be gifted to my eldest son and since it will get a lot of rough use, I've decided to back it with a no-pill, durable fleece. Now the dilemma is whether to piece the whole top together, back it with fleece and then quilt the whole quilt at once or cut the fleece the width and length of one strip, and QAYG (quilt as you go) the quilt in sections.

I'll leave that decision for another day!  For right now, I'm going to sew each of the 5 columns together in preparation for the next step.

Cheers, everyone!
This post was shared on:
Stitch by Stitch


Monday, December 31, 2012

Arkansas Crossroads - My First Modern Quilt

Finished quilt with borders will measure 60" by 80"
The inspiration for this quilt came from the December challenge by the Desi Quilters group:
1.Make any quilted item of any size
2.Use ONLY Black, White and ONE other colour. Fabric may be solid or prints.
The Arkansas Crossroads pattern first caught my attention on the Craftsy website (the block design seemed really simple) and I promised myself to make it one day. Well, here comes that day and I've decided to make a lap-sized quilt for my son, Siddhartha. I ordered a black & white charm pack from Keepsake Quilting which didn't arrive until last week which means I won't get the quilt done in time for the challenge deadline on December 31st, but I know Siddhartha will appreciate his quilt.
I picked out the white and gold fabrics and set to work.
Initially, the idea was to cut each 5" charm into four 2-1/2" squares to create the 16-patch square, but I quickly came to my senses and decided to use them as is and create 4-patch squares instead.
5" strips were cut from the white fabric and each strip was cut into 5" squares. And then another brainwave hit me. The alternate block in this pattern requires four white squares with half square triangles to be sewn to two opposite corners of each of the four squares. Instead, I decided to sandwich a 4-1/2" x 2-1/2" rectangle folded in half to create one-seam flying geese unit in each of the four seams on the block. So much less cutting and sewing!
All I had to do was to cut 4-1/2" strips from the gold fabric and cut again into 4-1/2" by 2-1/2" rectangles.
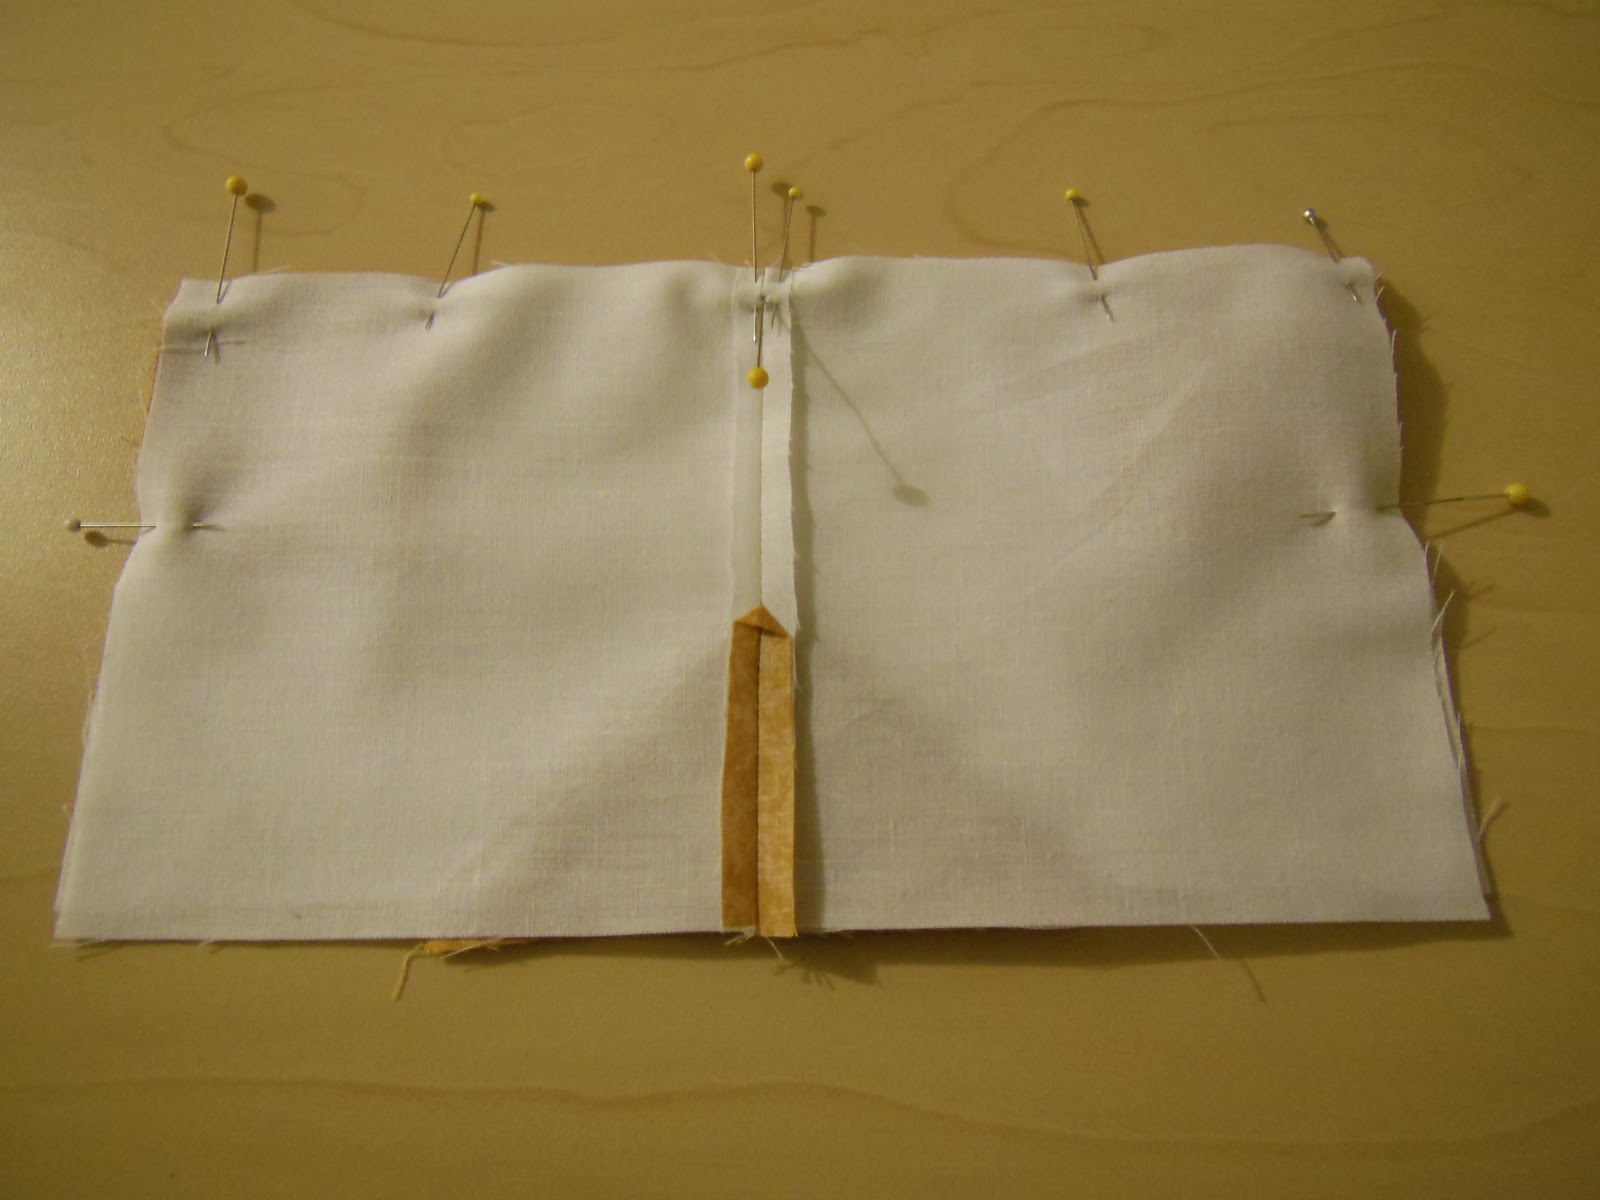
Each rectangle was folded in half and sandwiched between 2 white squares and pressed open to create a flying geese unit at the base. The seam on the back was pressed open. 


To create the 4 patch, a gold rectangle was folded in half, pinned between the top and bottom seams and sewn. The last seam on the 4-patch block was then pressed open.
The charm pack came with 50 black and white squares so I used all 50 squares + 2 black squares to make 13 black and white 4-patch units
and 12 white and gold crossroads units.
Since I've missed the deadline for the DQ December challenge anyway, I've ordered another package of black and white charms and plan to add two more rows to the length of the quilt.
Once the borders are attached, the finished quilt should measure approximately 60" x 80". I will present the finished quilt in a future blog.

Progress update.

Until then,
Cheers, everyone, and have a very happy New Year!


Saturday, December 8, 2012

Craftsy Block of the Month for May 2012

1. Modern Log Cabin Block


This Log Cabin block is supposed to be very improvisational.  There is no measuring or pre-cutting of strips.  The only suggestions were to skew the block so that the centre is framed and is off-centre.

Framing the center was easy.  I used a tulip fabric for the centre and chose to sew a narrow frame around it. 


To keep it off-center, I added narrow borders to the right and bottom of the centre block and added wider borders to the left and top of the centre block.  This was done to the second and fourth borders.

The finished size of this block measures 12-1/2" square.


2.  Wonky 5-Sided Log Cabin Block

This log cabin block is also improvisational and needs no measuring or pre-cutting of strips.


Rotated 180 degrees, it looks like a house!
In the beginning, there was a basket full of scraps.  The two suggestions were to create a wonky 5-sided log cabin block and to give it a scrappy look.


For the centre of the block, I chose to make a house which has 5 sides.  This was my first attempt at creating the 5-sided wonky log cabin block, but it was so small that I decided to frame it.
  

A second attempt to create a 5-sided block didn't succeed because the diagonal cut (green triangle at bottom right edge) was too small.  So I tried again.


For some odd reason, I found it really hard to keep from squaring up the block.  Notice the first time a wonky side was introduced, it was very soon after squared up so that the fifth side was lost.  The same thing is about to happen here.  So it's back to the scrap basket, as I try to finish up the block.


I usually try to maintain some order in the work place, but not so today.


The cutting table looks the worst.


Before attempting to create a truly wonky log cabin block, it looks like this mess will have to be cleaned up and order restored, which may help the brain to function better. Well, that never happened.

Instead I moved right on to creating that diagonal fifth side.  Here is tip #1.
To create that wonky side requires a (brave) deep cut spanning at least a couple of strips.


I realized that in order to maintain the diagonal edge, the two sides adjacent to it has to be trimmed  along its bias edge. This is tip #2.


And Here is tip #3.  When a strip is being added to this bias edge, the strip must be longer than the bias edge, so that it doesn't fall short of fabric when it's trimmed.

Having a bias edge on one side of the block didn't seem to do it, so I chopped off the adjacent edge. and created another wonky side.  And here's how the block ended up.  It finished at 12-1/2" square.


Now here's the really strange part of this entire exercise.  I ended up with a basket that has more scraps than when I began!  Don't ask me how that happened :)


Cheers & happy quilting!


Sunday, July 15, 2012

QAL #1 - Cathedral Windows

This first technique makes an Orange Peel Quilt which is a variation of the Cathedral Window pattern. This pattern is also called Rob Peter to Pay Paul.


5 of 16  blocks complete
I'm fascinated by Cathedral Window quilts!  Here's the easiest variation, but it sadly lacks the dimension of the traditional Cathedral Window quilt.  I've decided to make a cushion cover, approximately 14 inches square, for each of the techniques covered by this series of Quilt-Alongs.
14" cushion
You will need:
1 background fabric and a variety of solid or printed fabrics
Hand sewing needle and beige or grey thread to match background fabric
Scissors
A cushion insert approximately 14” square

  • 5 Batik Fabrics and 1 White Background
    Let's begin by selecting the fabrics for our Orange Peel quilt and tools for making the template.

    You will need a piece of paper, a CD and a pencil
    We need to make a template of a circle and a square.  The CD, which measures 4-3/4”, makes the perfect circle template.
    Draw a circle around the CD
    on the paper & cut it out

    Now make a template for a square that fits within this circle. Fold the circle in half, open it and fold again in half.  Mark each crease with a dot.
    Draw a line from dot to dot to make a square
    Draw a line from dot to dot and measure one side of this square.  Mine measured 3-1/2 inches.  This will be the finished size of each of the 16 blocks that will be joined to make the Orange Peel cushion cover.  The square template for the pane of the Cathedral Window should be cut 1/4” smaller all around, at 3-1/4”. 

    Transfer the dimensions of the 3-1/4” square to cardboard, cut it out and set it aside.

    Pick a color of fabric for the window pane and place it face to face with the background fabric.  I’ve chosen white for the background and frame, and green for the pane of the Cathedral Window.
    The squares of fabric
    are approximately 6" square

    Draw a circle on the background fabric.  I was able to draw three circles (using the CD) on the 18” side of a fat quarter.  Cut between the circles to make 3 units. Make one more unit using the remaining fabric to make four circles from each colour for a total of 16 units.
    Sew Around the Circle
    Using a needle and thread that matches the background fabric, hand sew around the circle with a running stitch.  Keep your stitches close together to get a good round shape when it is turned inside out.
    Mark & Cut Slit
    Place the square template on the coloured/printed fabric within the circle and cut a slit just above the top of the template and under the edge of the circle, without touching the sewn line.
    Snip Around Edge of Circle
    Leaving a ¼” seam, cut around the circle.  Snip at ¼” intervals to aid in turning the circle inside out. 
    Turn Through Slit
    Turn the circle inside out through the slit.
    Press
    Press the seam.
    Press Over Square Template
    Place the square template within the circle and press the frame over the template.  
    One completed Cathedral Windows block
    Pin the frame in place and sew down by hand or machine to form a Cathedral Window block.
    Make 16 blocks of varying colours and arrange them (4 across x 4 down) to preview the top of the cushion cover. To join the blocks, place two of them right sides together, and whipstitch on the back of the blocks. Whipstitch all 16 blocks together to make the top of the cushion cover.
    Pieced top of cushion cover
    An alternative method to assemble the Cathedral Window blocks would be to join adjacent blocks and then applique the flaps down.  To do this, first mark the lines along which the blocks will be joined.  (These pictures are from another project.)
    Draw lines for sewing
    Align two blocks, wrong sides together, and sew along the drawn line.  Do this in pairs or rows.

    Join two adjacent blocks
    Applique the flaps down.
    Sew flaps down

    Follow instructions for How to Assemble a Cushion Cover and your first Cathedral Windows project is complete!

    Stand back, admire and enjoy your Orange Peel cushion cover!
    Orange Peel/Cathedral Window Cushion