Showing posts with label Tutorial. Show all posts

Wednesday, March 5, 2014

Christmas Tree Ornament - a Tutorial


The inspiration for this ribbon tree ornament came from the one given to me and each member of our Tri-County Quilt Guild at our Christmas party. They were a part of our place settings and were made by committee members of the guild.

Hop over to my craft blog for a tutorial on how I made 16 of these for a Christmas party.

Enjoy!


Wednesday, September 18, 2013

Quilt Assistant - A Free Downloadable Quilt Design Software


At our last Quilt Guild meeting before summer break, the guild needed someone to take on the responsibility for their newsletter which is published once every two months. No one seemed interested in taking on the responsibility and, being one of the newest members and never having seen their newsletter, I was a little unsure of what the post involved.

Monday, June 10, 2013

Blogging Tips: Creating a Collage


An easy-to-use photo collage maker with many beautiful layouts to choose from. Completely online, so no downloads are required and it's FREE! Click on the images to enlarge.

Wednesday, May 29, 2013

How to Sew Triangles the Easy Way

Add caption
This article was taken from a newsletter I received from Penny Halgren of How To Quilt.

Monday, December 31, 2012

Arkansas Crossroads - My First Modern Quilt

Finished quilt with borders will measure 60" by 80"
The inspiration for this quilt came from the December challenge by the Desi Quilters group:
1.Make any quilted item of any size
2.Use ONLY Black, White and ONE other colour. Fabric may be solid or prints.
The Arkansas Crossroads pattern first caught my attention on the Craftsy website (the block design seemed really simple) and I promised myself to make it one day. Well, here comes that day and I've decided to make a lap-sized quilt for my son, Siddhartha. I ordered a black & white charm pack from Keepsake Quilting which didn't arrive until last week which means I won't get the quilt done in time for the challenge deadline on December 31st, but I know Siddhartha will appreciate his quilt.
I picked out the white and gold fabrics and set to work.
Initially, the idea was to cut each 5" charm into four 2-1/2" squares to create the 16-patch square, but I quickly came to my senses and decided to use them as is and create 4-patch squares instead.
5" strips were cut from the white fabric and each strip was cut into 5" squares. And then another brainwave hit me. The alternate block in this pattern requires four white squares with half square triangles to be sewn to two opposite corners of each of the four squares. Instead, I decided to sandwich a 4-1/2" x 2-1/2" rectangle folded in half to create one-seam flying geese unit in each of the four seams on the block. So much less cutting and sewing!
All I had to do was to cut 4-1/2" strips from the gold fabric and cut again into 4-1/2" by 2-1/2" rectangles.
Each rectangle was folded in half and sandwiched between 2 white squares and pressed open to create a flying geese unit at the base. The seam on the back was pressed open. 


To create the 4 patch, a gold rectangle was folded in half, pinned between the top and bottom seams and sewn. The last seam on the 4-patch block was then pressed open.
The charm pack came with 50 black and white squares so I used all 50 squares + 2 black squares to make 13 black and white 4-patch units
and 12 white and gold crossroads units.
Since I've missed the deadline for the DQ December challenge anyway, I've ordered another package of black and white charms and plan to add two more rows to the length of the quilt.
Once the borders are attached, the finished quilt should measure approximately 60" x 80". I will present the finished quilt in a future blog.

Progress update.

Until then,
Cheers, everyone, and have a very happy New Year!


Sunday, December 2, 2012

Sandy Quilt Block Drive - At the Finish Line

Voila!  I'm so excited to unveil my finished blocks for the Sandy Quilt Block Drive.


My 10 blocks and quilt label are ready to be shipped to the team leader.  She will turn the blocks into wonky log cabin blocks and then will use her longarm quilting machine to layer and finish the quilt.  Each quilt uses 42 blocks, so my 10 will be a small part of the whole quilt that will be presented to someone who needs it.

Each block finished at 10-1/2".


Vertical sashing strips were cut at 10-1/2 "L x 2-1/2"W.


The vertical strips were sewn to two opposite sides of each block and pressed away from the center of the block. Horizontal strips were then cut at 14-1/2"L x 2-1/2"W, sewn to the two remaining sides and pressed away from the center of the block.


The black borders make the center of the blocks pop!  Take a look at two blocks with and four without borders.


The other requirement was to provide the team leader with a 5" square quilt label which will be sewn to the back of the quilt.  I designed it on the computer. To use up the entire sheet of printer fabric, I created two labels. One will accompany my first 10 blocks and the other has been set aside for my next shipment.


Making these quilt blocks was a lot of fun and made a small dent in my stash of scraps.  It's going towards a good cause which adds to my sense of satisfaction. 

My hope is that you will be inspired to help out, too! 

Cheers!


Related Links:


Friday, November 30, 2012

Sandy Quilt Block Drive - An Update

Yes, the blocks should have been shipped off by now, but Thanksgiving happened and it was the best TG ever!  Now that all the feasting is done, it's back to finishing those blocks! To refresh our memories, here are the blocks at 6-1/2 inches and you can catch up on the start of this project here.


So, on with the sewing and pressing and trimming and pressing...


And here they are at 10-1/2" square.


Notice how they look right up against one another.  Actually let me show you a close up of a pair of blocks. They kind of blend into each other.


Here are two blocks with sashing and four without...Okay, I have to admit each grouping has its own charm.  However, in order to create wonkiness, the sashing is necessary. The black borders give them a stained glass look, don't you think?


It's late now, so we'll save the finale for another day, but hold on to this last image because the finished blocks look amazing! 

Cheers!

Related Links:


Monday, November 19, 2012

Sandy Quilt Block Drive - In the Beginning

A block made following Quilting Gallery's Tutorial
Wonky Scrappy Log Cabin Quilt Block

The Quilting Gallery needs help with their first ever Quilt Block Drive for victims of  super storm Sandy.  I volunteered to make 10 blocks for the Sandy Quilt Block Drive.

They've provided a great tutorial for the Wonky Scrappy Log Cabin Quilt Block, a sample block of which is pictured above.

So I got organized and pulled out all the strips I've collected over the years. Each strip should measure between 0.75" and 2".

Strips from my stash
Washed and ironed several more fat quarters, also from my stash.


Fat Quarters at the ready
Cut more strips.


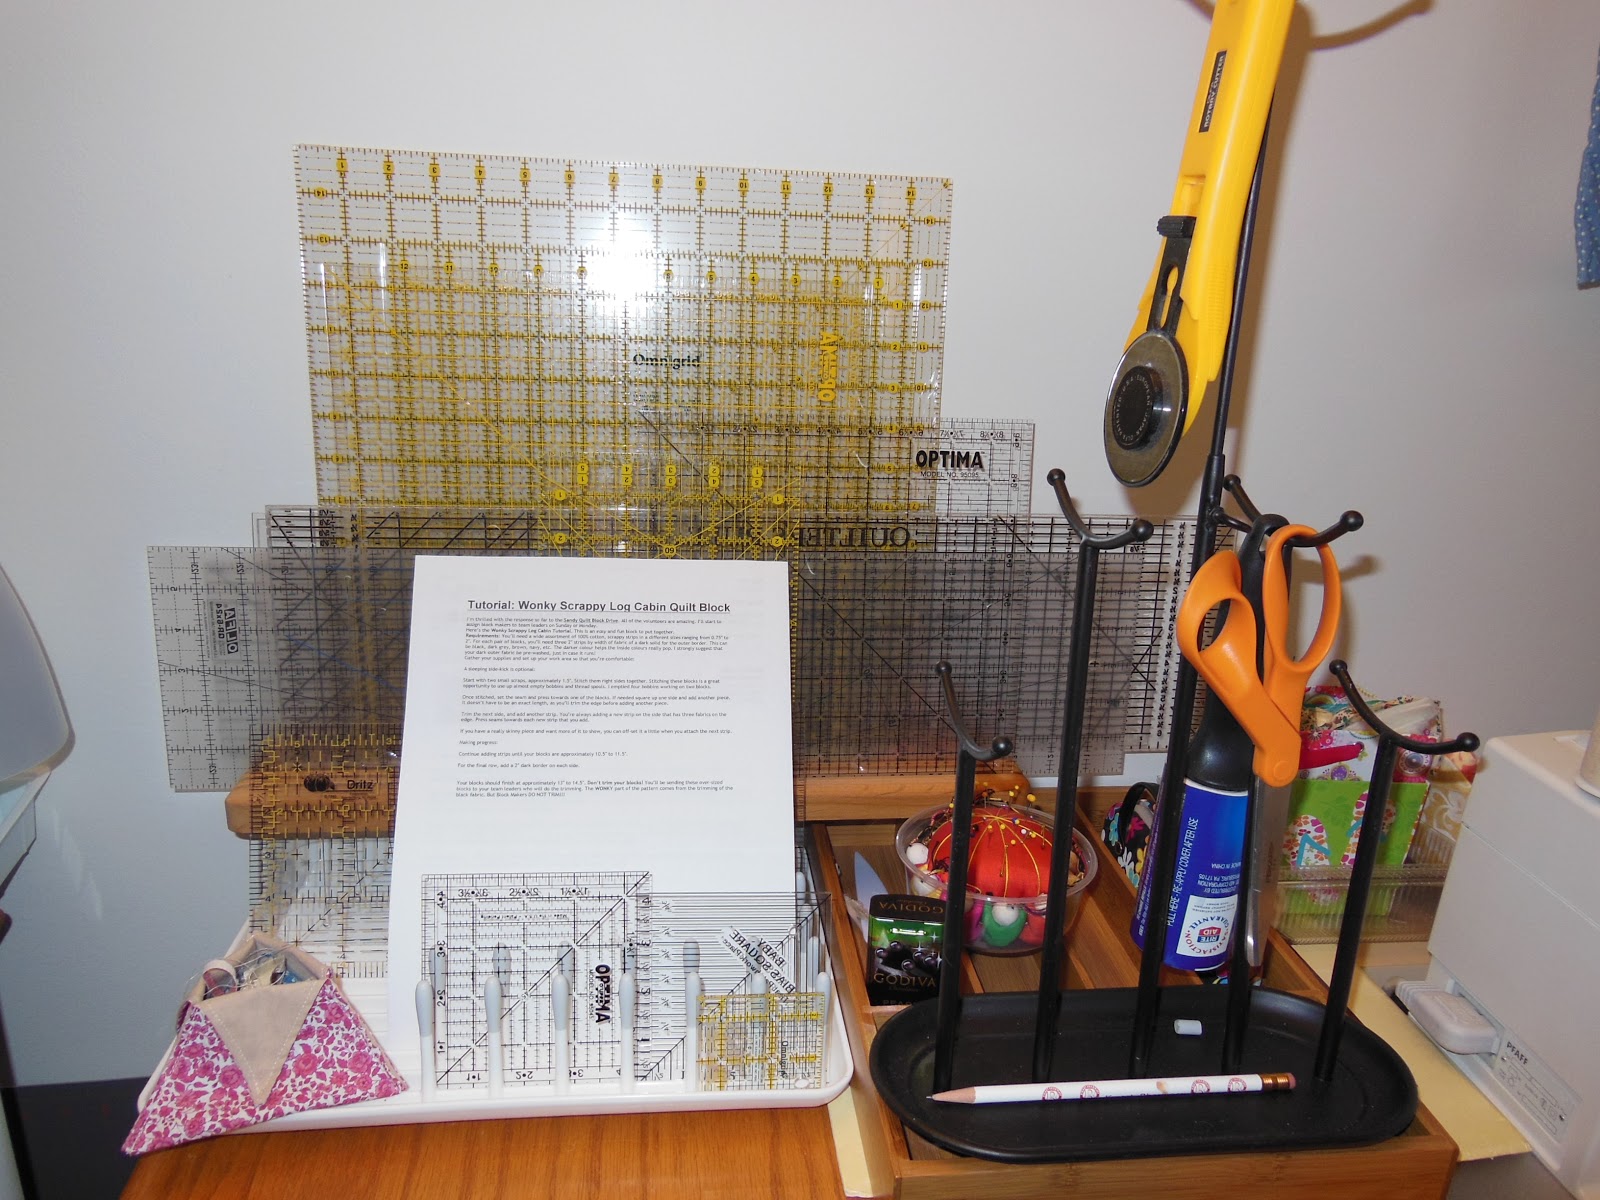
And began organizing my work area.  Placed the instructions in a visible location away from all the activity.

Instructions from Tutorial without pictures
Set up my cutting table with ruler and rotary cutter.

Cutting Station
Turned the iron on high.

Ironing Station
Readied the sewing machine.


Sewing Station
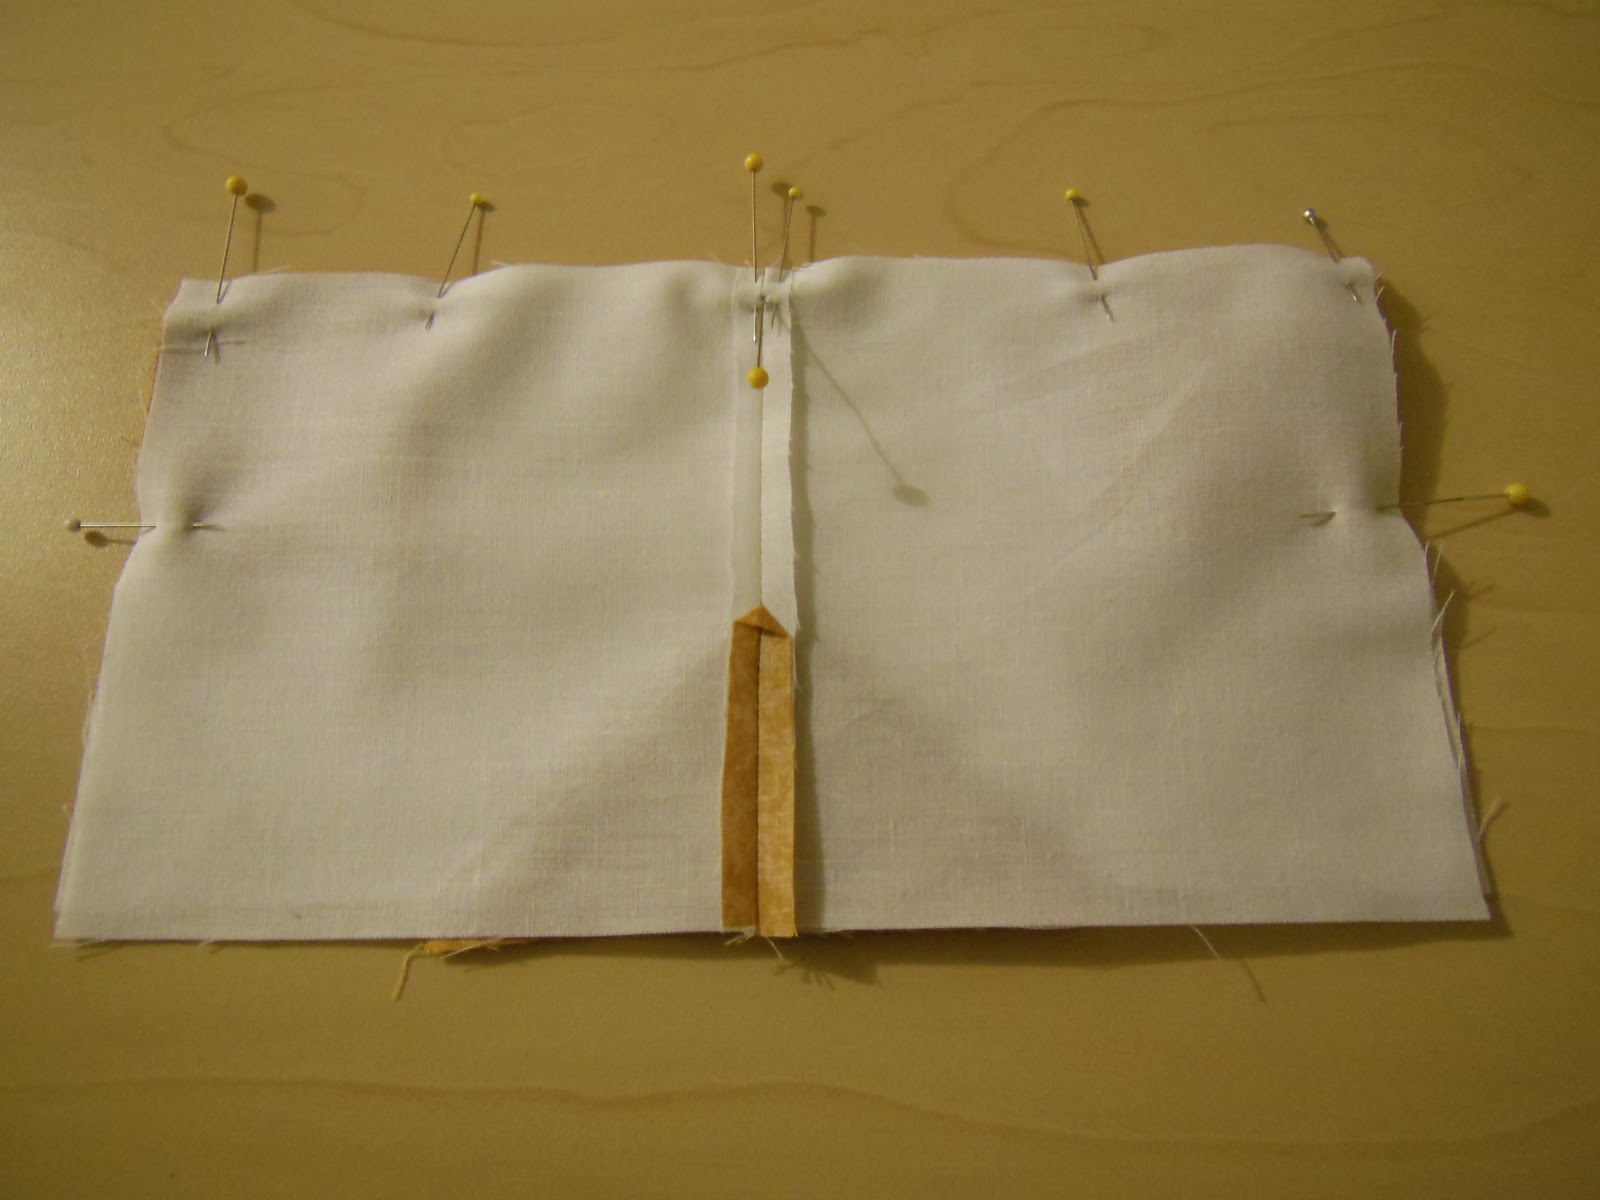
And began chain piecing the first two 1-1/2" squares.

Chain piecing center of block
They were pressed open and away from the center.  The third strip was then added.

Chain piecing the third strip
The sewn seams were pressed in place.

Pressing sewn seams prior to trimming
The blocks were then trimmed even with the top and bottom of the block.

Blocks are trimmed
And pressed open.

Pressed open
And so the process continued of chain piecing, pressing, trimming and pressing. And pretty soon the sewing area looked pretty messy.

Time to clean up!
My blocks (14 in all) currently measure 6-1/2" square.  They're supposed to finish at around 11.5" without borders and finish at between 13" to 14.5" after a 2" border is sewn on all four sides of each block.  So I'm at the halfway point.


Hope to get them done by tomorrow evening so I can mail them on Tuesday.  Here is a preview of what my blocks look like on the design wall.


I love quilting!  And I love quilting even more when it's for such a good cause!

Cheers!


Monday, November 5, 2012

Greek Key Log Cabin Quilt - Tutorial

This design is also known as a Spiral Log Cabin.

This wall quilt is 20 inches square
Selecting fabrics for a quilt is the first and one of the most enjoyable steps in designing and making a quilt.  All fabrics were fat quarters that were picked from an existing stash.


Dots, checks and stripes

Using my colored drawing, I picked the focus fabric.  Because this focus fabric would have to serve as the last log, (22" long) and because fat quarters are cut 18" by 22" long, I decided to cut the strips 2" wide and also folded each fat quarter in half along the 22" edge, prior to cutting.


Colored drawing
I then created a strawman for the sewing sequence and penciled in the color replacements at the bottom of the drawing, along with the cutting measurements for each log.  I next calculated the number of strips I would need from each fabric and wrote that at the top of the strawman.


Strawman of sewing sequence
Strips were cut 2" wide for a finished size of 1-1/2" logs.


2" wide strips
Following the sewing sequence on the strawman, the first two logs at the center of the block were sewn together, the length trimmed to equal the width and pressed away from the center (checked fabric in this case) of the block.
1st 4 logs are sewn
Instead of cutting each log to the required length, the strip method of sewing the logs together saved a lot of time.  The new strip is placed right side up, the sewn block placed on the strip face down on it (making sure the new log is sewn on the correct edge).  This strip piecing method saves a great deal of time if several log cabin blocks have to be made.

Sewn block is placed on strip
What I noticed was that, beginning with the 5th log, the log that comprised the same fabric as the new strip always appeared in the top right hand corner.

Block placement
To avoid skewing the block, the strip is placed a tiny bit above the block.  The sewn block is then squared up by cutting away the excess at the top and bottom of the block.


Cut excess fabric at top of sewn block
Cut excess fabric at bottom of sewn block
All sewn seams are pressed away from the center of the block.


Press all seams towards newest log
The rhythm therefore is to sew, trim and press.  With the quilt top done, it was time to decide on the binding fabric.  Because the block is so graphic and angular, I decided on a floral fabric for the binding.


Floral binding fabric
The quilt top was layered with batting and backing fabric and pinned in place. The batting and backing fabric were then cut 1/2" larger than the quilt top, so that the binding finished at 3/4".


Quilt top layered and pinned
The top was quilted in the ditch (within the seams), the binding was sewn on and the quilt was done!


Quilted and bound 
Here is the back of the quilt.


Back of quilt
The quilt can be used as a table topper or as a wall hanging.


Table topper
I hope you enjoy making this log cabin quilt as much as I did.

Cheers!