Pages

Tuesday, July 31, 2012

Tuesday's Tips on Blogging

Blogging Tip #1


I'm relatively new to blogging and am learning something new every time I visit my blog or someone else's blog. Well, here's something I learned about setting up Pages and how to link them to relevant topics.

Initially, I would just add more information to the top of my page.  But I found that unless I set up a list and pointed it to the appropriate spot on that page, it was too tedious to scroll down the page to find what I was interested in.  Then I found that I could post a blog on my Home page about the topic related to a Page and set up a list item to point to that blog post.  Much more efficient.

To do this, set up a list at the top of your Page, highlight an item, click Link on the toolbar, and enter the link in the blank space next to Web Address.  To enter the URL address, first locate the blog post on your Home page, click on the title of the post and copy and past the URL that is displayed up top.  I did this on my Quilts Page.  Item #1 Cats Wallhanging points to a header imbedded in the same page.  Item #26 Star Windows Rug Mug links to a blog post.

So this worked for me for a while, until I discovered that links can also point to other blogs out there, so that's what I did for my Recipes Page.  Open this blog in a new window and click on the Recipes tab.  Readers who click on this tab are redirected to My Favorite Recipes blog.  I did this by

  • entering My Favorite Recipes blog 
  • highlighting and copying the URL from the top of the page
  • selecting Pages from the Design Menu
  • expanding the drop-down box for New Page
  • clicking on Web Address
  • entering a Page Title and URL of My Favorite Recipes blog address
  • clicking Save
Recently, I started including Labels in each of my blog posts.  I like sharing any and all techniques related to my quilt projects, as an example.  So I make sure that I include a Label of Tutorial on such a blog post.  I also set up Labels to be displayed along the right side of my blog.  Imagine my excitement when I found out that a Page can also redirect readers to a given Label!  Take a look at my Tutorials Page in a new window.    I set this up to point to the Tutorial Label by
  • selecting Tutorial from the list of Labels on the right side of my blog page 
  • highlighting and copying the URL from the top of the page
  • selecting Pages from the Design menu
  • expanding the drop-down box for New Page
  • clicking on Web Address
  • entering a Page Title and the URL that I copied previously
  • clicking Save
Similarly, I could include a label of Gardening on a blog post and redirect readers of my Gardening page to that label.  Neat, eh?

Here you have several different ways of setting up Pages.  I hope you will try some of these techniques and have fun doing so.

Cheers!


Monday, July 30, 2012

Monday's Must-Haves for a Quilter

My Best Friend, Jack!

Besides the usual trio of rotary cutter, mat and ruler, an essential item and a best friend in a quilter's space is 'Jack'.  I was a bit mystified when I first heard about Jack from one of our modern quilting members on Desi Quilters.

Jack is your seam ripper!  Get it?  Isn't that cute?
Jack the Ripper
I have this and several other variations of the same scattered at every station of my work space.  I need it for the obvious reason, to reverse-sew, and for other purposes such as guiding pieces under the needle of my sewing machine or to poke corners out with the cover intact.

On sale, this particular notion costs $3.99 at present on Nancy's Notions and variations of this tool range from $3.99 to $9.95 for a fancy seam ripper.

I now come to the main reason for this post.  What do you suppose is the purpose of the other end of Jack?  The side with the little red ball at the tip?  My presumption is that the red tip is used when one wants to rip a long seam from the wrong side or back of a piece of sewing.  It guides the blade through the seam without cutting through the fabric (if one is careful) because the sharp point is now on the outside and out of the way.

Please post comments for what you think is the function of this little red ball on a seam ripper.  It would be interesting to hear your take on this!

Cheers!


Friday, July 27, 2012

Friday's Free-For-All


1.414: every quilter’s magic number


I received this most interesting and informative article from Martingale Publishing in my inbox today.  It answers questions on how to calculate 
  • the cutting measurements for corner- and side-setting  triangles when the blocks in a quilt have been placed on the diagonal or on point.
  • the width and length of the quilt center in which blocks have been placed on point or on the diagonal.    
It's written in such simple language and explained so well that even I can understand the concepts.  In fact, I found it to be interesting enough to want to share it with all the quilters out there for whom this geometric concept is a mystery.

Hope you find it as interesting a read as I did.

Cheers!
Sunday, July 22, 2012

QAL #2 - Cathedral Windows


1 Seam Flying Geese Method

For the second method in this series for constructing Cathedral Windows, we will be making a 20” cushion or table topper comprising 16 blocks arranged 4 blocks across by 4 blocks down.
Cushion Cover
Without the cushion insert


The components of a Cathedral Window block are the foundation/ background fabric, the frame and the windowpane.  It is really simple to make this block using two Flying Geese blocks, each made with just 1 seam.

Cathedral Windows block constructed with 
2 Flying Geese blocks, each made with 1 seam

Table for Cutting Instructions
Note:  
  1. The cutting instructions will make 1 Flying Geese unit. 2 units are required for each Cathedral Window block.
  2. The numbers in parentheses in the column descriptions represent the number of units required for each FG unit.  
  3. The window pane should be cut ¼” smaller than the finished size of the frame.  Measure for and cut the window panes after the first block is constructed.

Block Size
Foundation (2)
Frame (1)
Window Pane (1) approx.
4”
2½”
2½” x 4½”
2”
5”
2¾”
2¾” x 5”
2½”
6”
3½”
3½” x 6½”
3”
8
4½”
4½” x 8½”
4”
10”
5½”
5½” x 10½”
5”
12”
6½”
6½” x 12½”
6”

In the picture below, the patterned squares will form the foundations, the white rectangles the frames and a variety of printed squares (not shown) will form the window panes.  For 16 Cathedral Window blocks that will each finish at 5” square, cut

64 patterned squares 2-3/4" (foundations)
32 white rectangles 2-3/4" x 5" (frames)
16 patterned squares 2-3/4" (window panes – not shown)


Fabrics for Cathedral Windows block are cut and ready to piece

Form two sandwiches as follows:
  1. Place 1 patterned square, facing up, on the work surface.
  2. Fold 1 white rectangle in half, wrong sides together, aligned at the raw edges with the top of the patterned square.
  3. Place 1 patterned square, face down, on top of the white, folded rectangle.


Sandwich - make 2
Begin sewing from the raw edges all the way down the right side only.  Make sure that the folded edge of the rectangle is closest to you and notice it is 1/4" shorter than the two squares.


Sew right sides only

Open up the center rectangle, aligning the raw edges with the bottom edge of the unit, making sure the points on the base meet the left and right edges of the unit.  Also make sure that the tip of the Flying Geese is 1/4" from the top edge.  Pin at the base, opening the seam on the back.

 
 Pin the base and press seam open on back

Press the seam open and sew the base of two Flying Geese units together.


2 Flying Geese units sewn at base
Press the seam open.

Press all seams open to reduce bulk

Place a window pane square in the center of the frame and pin the bias/dimensional sides of the frame over the window pane.
Frame is folded over pane and pinned

Sew the frame in place and a Cathedral Window block is complete.

One block is complete
Here's an arrangement of four blocks.


An arrangement of 4 blocks

Make 16 Cathedral Window blocks, arrange 4 across by 4 down.
Preview arrangement
Sew the blocks together, making sure that the points on each block match points on adjacent blocks,  and the top is complete.

Follow instructions for How to Assemble a Cushion Cover, using an 18" cushion insert.


To make a table topper, cut a square of material the same size as the top, place the two pieces right sides together, sew all the way around the four sides leaving a space for turning, turn it inside out, sew the opening, press the seams and it’s done!


I hope you have as much fun as I did making these Cathedral Windows!


Cheers!


Sunday, July 15, 2012

QAL #1 - Cathedral Windows

This first technique makes an Orange Peel Quilt which is a variation of the Cathedral Window pattern. This pattern is also called Rob Peter to Pay Paul.


5 of 16  blocks complete
I'm fascinated by Cathedral Window quilts!  Here's the easiest variation, but it sadly lacks the dimension of the traditional Cathedral Window quilt.  I've decided to make a cushion cover, approximately 14 inches square, for each of the techniques covered by this series of Quilt-Alongs.
14" cushion
You will need:
1 background fabric and a variety of solid or printed fabrics
Hand sewing needle and beige or grey thread to match background fabric
Scissors
A cushion insert approximately 14” square

  • 5 Batik Fabrics and 1 White Background
    Let's begin by selecting the fabrics for our Orange Peel quilt and tools for making the template.

    You will need a piece of paper, a CD and a pencil
    We need to make a template of a circle and a square.  The CD, which measures 4-3/4”, makes the perfect circle template.
    Draw a circle around the CD
    on the paper & cut it out

    Now make a template for a square that fits within this circle. Fold the circle in half, open it and fold again in half.  Mark each crease with a dot.
    Draw a line from dot to dot to make a square
    Draw a line from dot to dot and measure one side of this square.  Mine measured 3-1/2 inches.  This will be the finished size of each of the 16 blocks that will be joined to make the Orange Peel cushion cover.  The square template for the pane of the Cathedral Window should be cut 1/4” smaller all around, at 3-1/4”. 

    Transfer the dimensions of the 3-1/4” square to cardboard, cut it out and set it aside.

    Pick a color of fabric for the window pane and place it face to face with the background fabric.  I’ve chosen white for the background and frame, and green for the pane of the Cathedral Window.
    The squares of fabric
    are approximately 6" square

    Draw a circle on the background fabric.  I was able to draw three circles (using the CD) on the 18” side of a fat quarter.  Cut between the circles to make 3 units. Make one more unit using the remaining fabric to make four circles from each colour for a total of 16 units.
    Sew Around the Circle
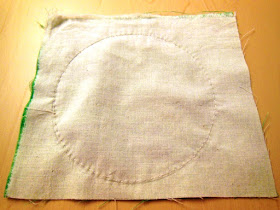
    Using a needle and thread that matches the background fabric, hand sew around the circle with a running stitch.  Keep your stitches close together to get a good round shape when it is turned inside out.
    Mark & Cut Slit
    Place the square template on the coloured/printed fabric within the circle and cut a slit just above the top of the template and under the edge of the circle, without touching the sewn line.
    Snip Around Edge of Circle
    Leaving a ¼” seam, cut around the circle.  Snip at ¼” intervals to aid in turning the circle inside out. 
    Turn Through Slit
    Turn the circle inside out through the slit.
    Press
    Press the seam.
    Press Over Square Template
    Place the square template within the circle and press the frame over the template.  
    One completed Cathedral Windows block
    Pin the frame in place and sew down by hand or machine to form a Cathedral Window block.
    Make 16 blocks of varying colours and arrange them (4 across x 4 down) to preview the top of the cushion cover. To join the blocks, place two of them right sides together, and whipstitch on the back of the blocks. Whipstitch all 16 blocks together to make the top of the cushion cover.
    Pieced top of cushion cover
    An alternative method to assemble the Cathedral Window blocks would be to join adjacent blocks and then applique the flaps down.  To do this, first mark the lines along which the blocks will be joined.  (These pictures are from another project.)
    Draw lines for sewing
    Align two blocks, wrong sides together, and sew along the drawn line.  Do this in pairs or rows.

    Join two adjacent blocks
    Applique the flaps down.
    Sew flaps down

    Follow instructions for How to Assemble a Cushion Cover and your first Cathedral Windows project is complete!

    Stand back, admire and enjoy your Orange Peel cushion cover!
    Orange Peel/Cathedral Window Cushion


Cathedral Windows - A Quilt-A-Long

Introduction

Get ready for some fun! Starting the third week in July 2012, we will learn:

  • 3 techniques for constructing the Cathedral Windows block:
  1. The applique method.  This is probably the simplest one of all with no fabric wastage.
  2. The dimensional one-seam Flying Geese method.  There's some fabric wastage here.
  3. The dimensional Square-In-A-Square method.  There's less fabric wastage in this one.
  • how to Quilt-As-You-Go where the top, batting and backing are layered and sewn in such a way that machine quilting is much easier to do because it's done in columns rather than trying to manage a whole, big quilt at once.

We will be making a cushion cover for each of the techniques described above.

How To Assemble a Cushion Cover or Table Topper

Note: To make a cushion insert, take a look at Gayathri's tutorial. She makes it look so easy to do!

Two back panels
Cut two squares of fabric, each measuring 14” square.  Fold a ¼” seam and fold again in half on both pieces. Manipulate the larger folds so that there is a 4" overlap between the two rectangles. Sew over the first 1/4" fold on both pieces.

Place the pieced cushion cover, face up, on the work surface.  Place 1 rectangle on the cushion cover, face down, aligning the top edges.  Place the second rectangle, face down, on the cushion cover, aligning the bottom edges and overlapping the first rectangle by at least 4".
Cushion cover assembly

Pin all around. Sew around the four sides.  Snip the corners. Turn the cover inside out through the overlapping panels and insert a 14" cushion.
Front of cushion 
Back of cushion 
To make a table topper, cut a square of material the same size as the top, place the two pieces facing each other, sew all the way around the four sides leaving a space for turning, turn it inside out, sew up the opening, press the seams and it’s done!